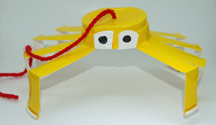
Great for Halloween or a spider unit in school, these spiders are quick and fun to make. If you want, you can twist one of the pipe cleaner legs to make the spider “hold” a name to identify a child’s desk or as a placecard at a Halloween party.
What You Need: 1 “cup” section from egg carton; black tempera paint; 2 black pipe cleaners; 2 googly eyes; paintbrush; glue; 1/8″ hole punch or poking tool.
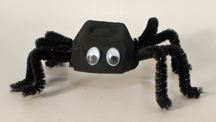
How You Make It: Adults should precut egg carton and pipe cleaners and poke the leg holes for littler kids. Paint egg carton section black and let dry. Poke or punch four holes on each of two sides of the egg carton cup. Cut each pipe cleaner in half, poke in one hole and out the opposite side and bend into leg shapes. Use glue to add googly eyes.
Posts Tagged ‘spider crafts’
Egg carton spider
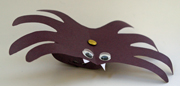
Thursday, October 18th, 2007Spider bracelet made by tracing hand
Thursday, September 27th, 2007These spiders can be made as bracelets or rings. Preschoolers love wiggling them around. It’s even more fun because it’s made by tracing the child’s own hand!
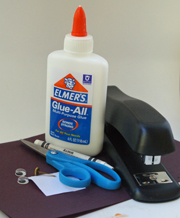
What You Need: black construction paper; 2 googly eyes; office brad; white crayon; scrap of white paper; glue; scissors; stapler.
How You Make It: Fold construction paper in half. Have child place hand at fold, about halfway down the palm. Using white crayon, trace fingers (but not the thumb). Unfold and cut out. Use pencil or crayon to roll “legs” so they curl under a bit. Cut strip of black construction paper 1 inch wide and about 1″ longer than the child’s wrist. Staple ends together. Use brad to attach wrist loop to spider’s body. Glue on eyes and little triangles cut from white paper for fangs.
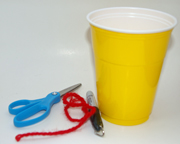
Plastic cup spider for Halloween
Thursday, September 6th, 2007Imagine a classroom full of these spiders jiggling and dangling at Halloween time, or during a preschool theme about spiders and bugs!
What You Need: disposable plastic cup, scissors, black marker, yarn.
How You Make It: Using scissor points or other pointy tool, adult pokes small hole in bottom of plastic cup. Child makes spider legs by making 12 cuts from the top of the cup to about 1 inch from the bottom of the cup. (remember: Enjoy the Process! Precision isn’t a big deal.) For the eyes, cut two of the “legs” off at about 1 inch. Fold eyes upward and add eyeball using black marker. Opposite the eyes, cut off the back two “legs” so you are left with eight legs. Fold legs downward at the crease. Now, hang your wiggly spider with a knotted strand of yarn.
“We tried it” tip: Because this craft involves the cutting of a fairly thick cup, it might be best-suited to older preschoolers with more-developed motor skills and experience with scissors.
Suggested storybook:The Very Busy Spider by Eric Carle
Paper plate spider web
Thursday, August 30th, 2007This is a quick Halloween craft in which kids get to watch what happens as marble roll around on the paper plate and make cool patterns. This technique is also fun when you use a variety of paint colors. Besides Halloween, this craft could be used with the movie or book Charlotte’s Web.
What You Need: sturdy, white, high-rimmed paper plate (such as Chinet), black tempera paint, 4 to 6 marbles, plastic spider ring.
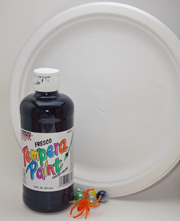
How You Make It: Apply many tiny (1/8″ or so) dots of black paint scattered around the paper plate. (Adult might need to do this for the youngest kids.) Child places marbles in plate and gently rolls them around to create web-like designs. Once dry, place or glue spider ring in plate. You can cut off the ring part if you’d like.
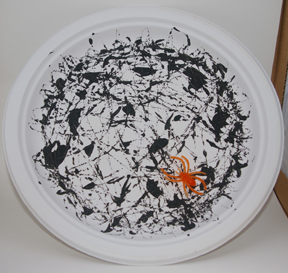
Safety Alert: Marbles can pose a choking hazard. Only do this craft with children who are developmentally ready to play with small objects.